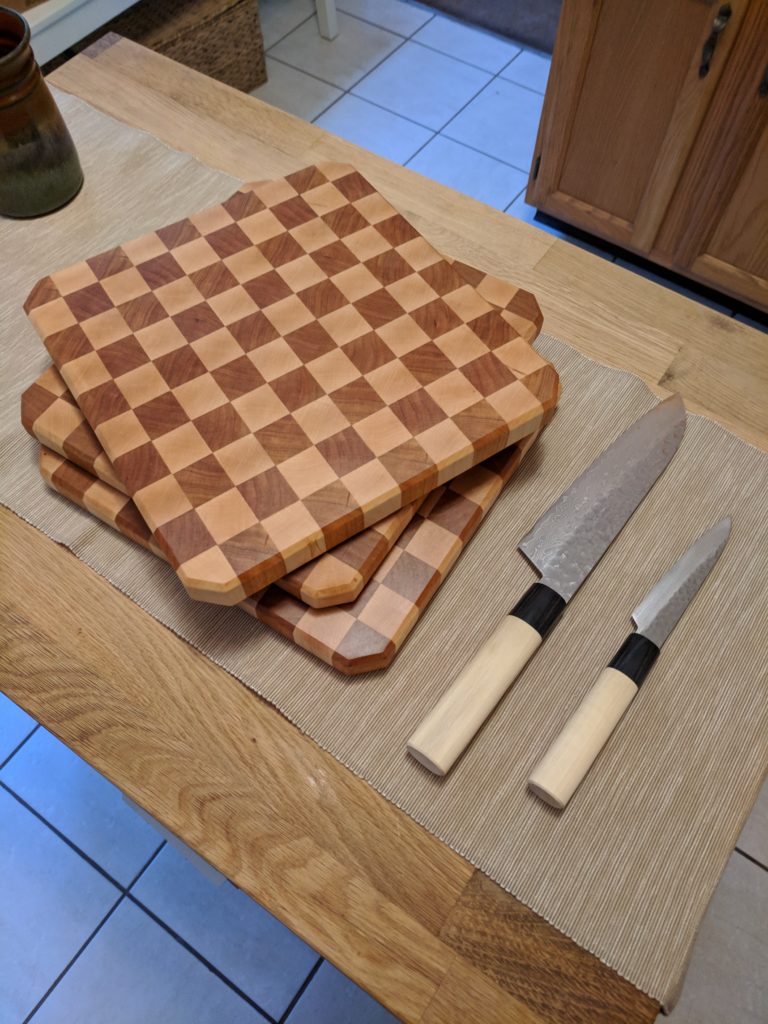

This winter I decided to start producing a variety of cutting boards to have in stock for the holidays. I just completed the first pieces in that batch and posted them on my Etsy store.
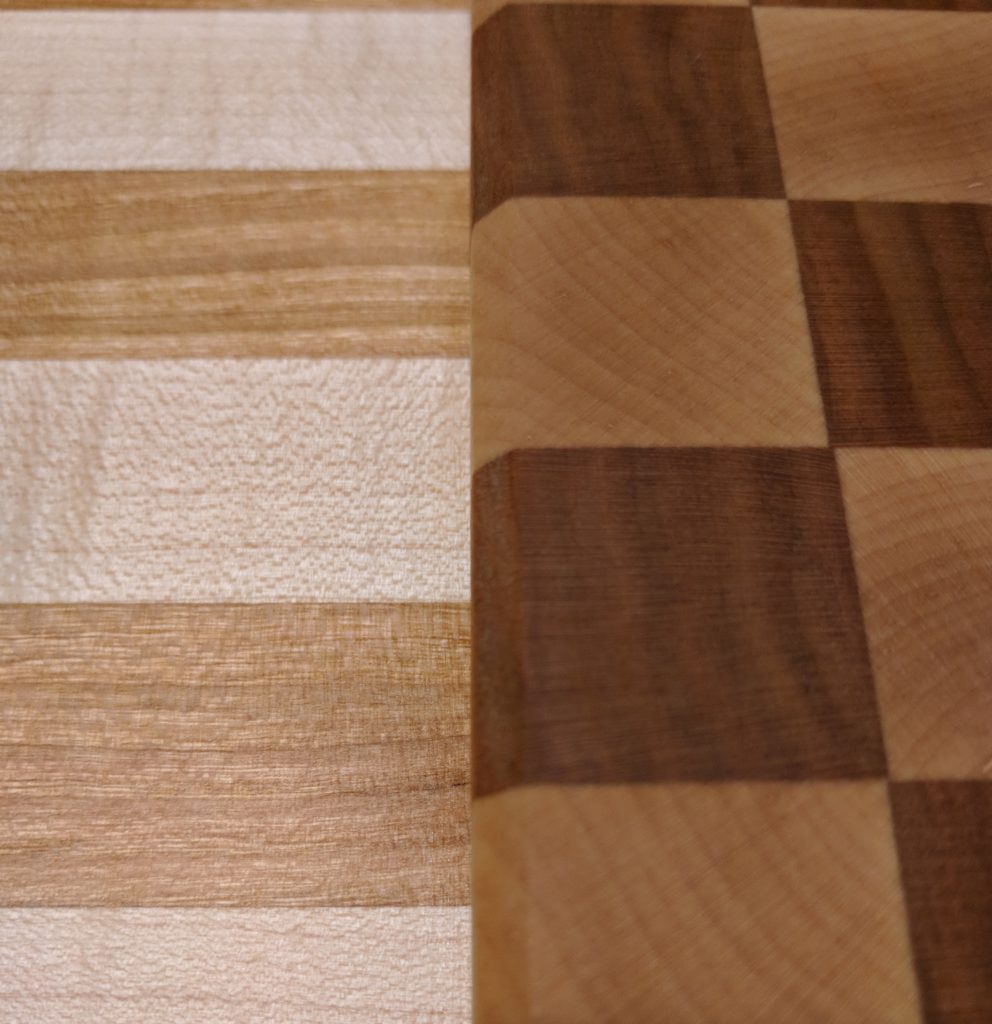
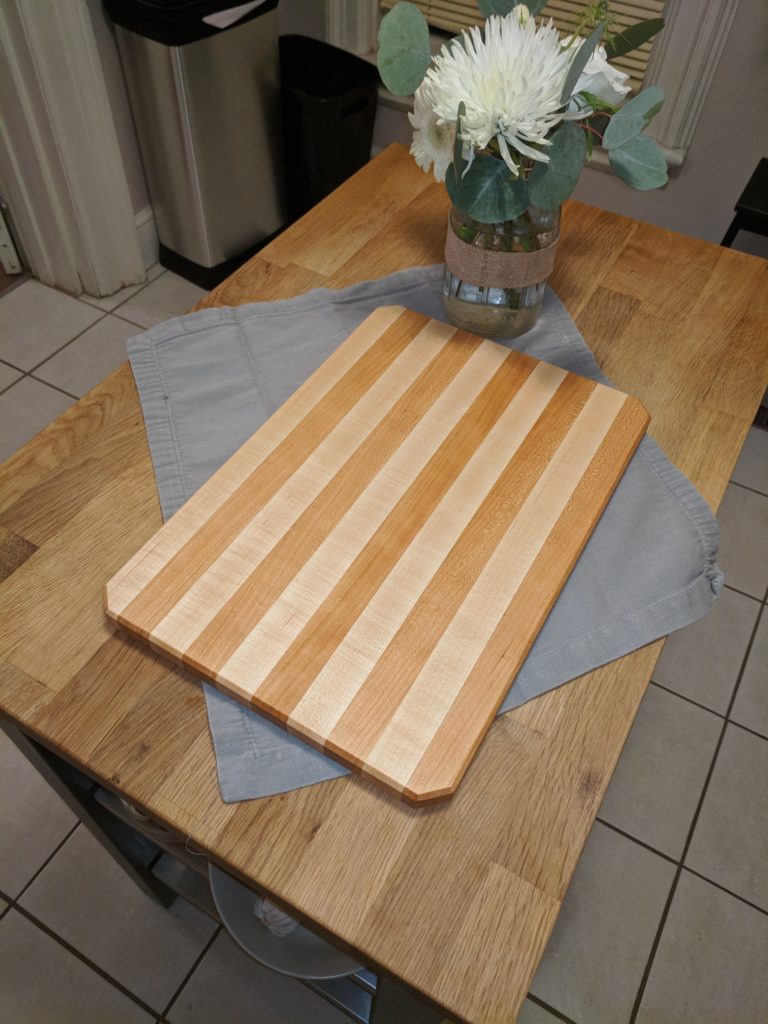
I chose to make both striped and checkered boards (the striped option being much easier to make). I chose maple and cherry for their contrasting colors and their toughness. With these hardwoods, the boards should last for years with little wear.
The first step in the process was to mill the lumber. Both the cherry and maple started off as S2S 5/4 lumber, with rough edges and planned faces. I jointed the edges, and ripped the boards to 1 inch wide.
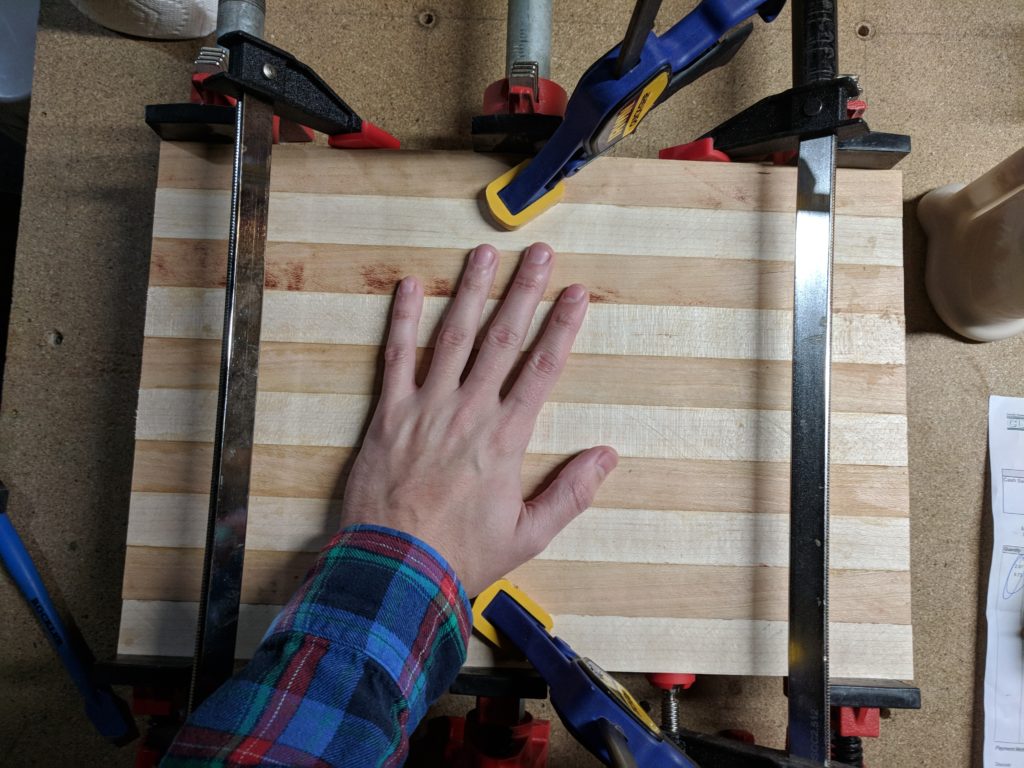
Both the striped boards and checkered start off the same way, the 1 inch stripes are cut to length, rotated, and glued face to face. On the stripped board, the length is simply the length you want the final board to be. The stripes end up being the thickness of your original board, with the board the thickness of your rip cuts.
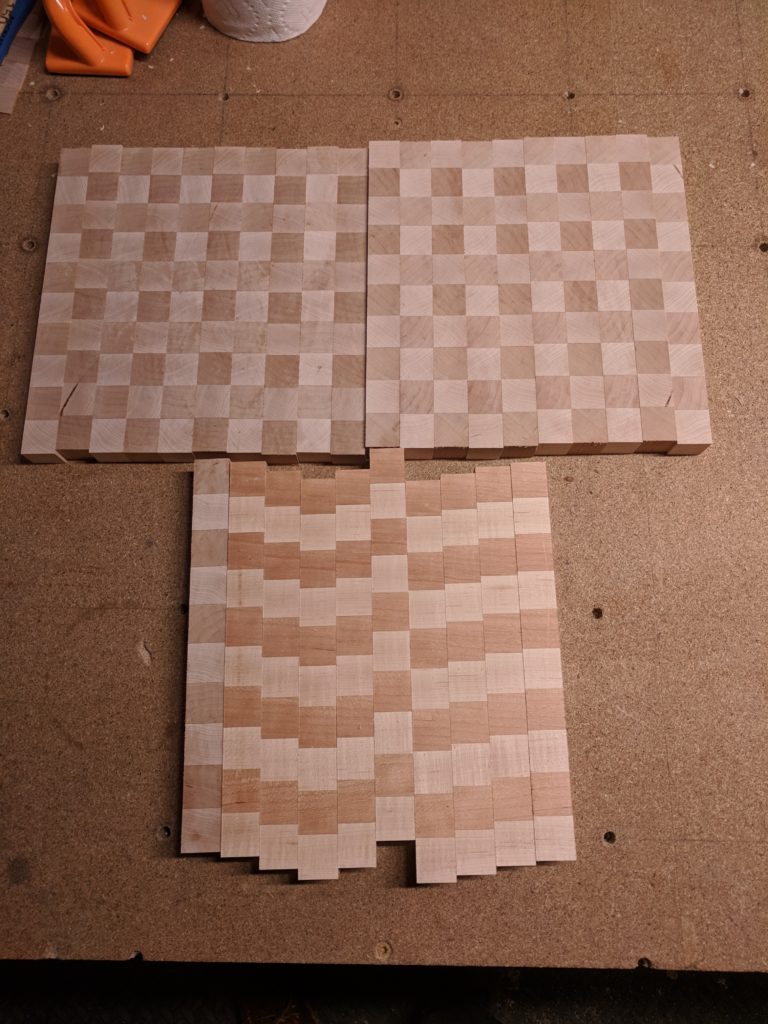
The checkered board takes a bit more thought. The length you cut the ripped strips to needs to be the thickness you’d like your final board to be, multiplied by the number of checkers you’d like to end up with (plus some allowance for the kerf of the saw).
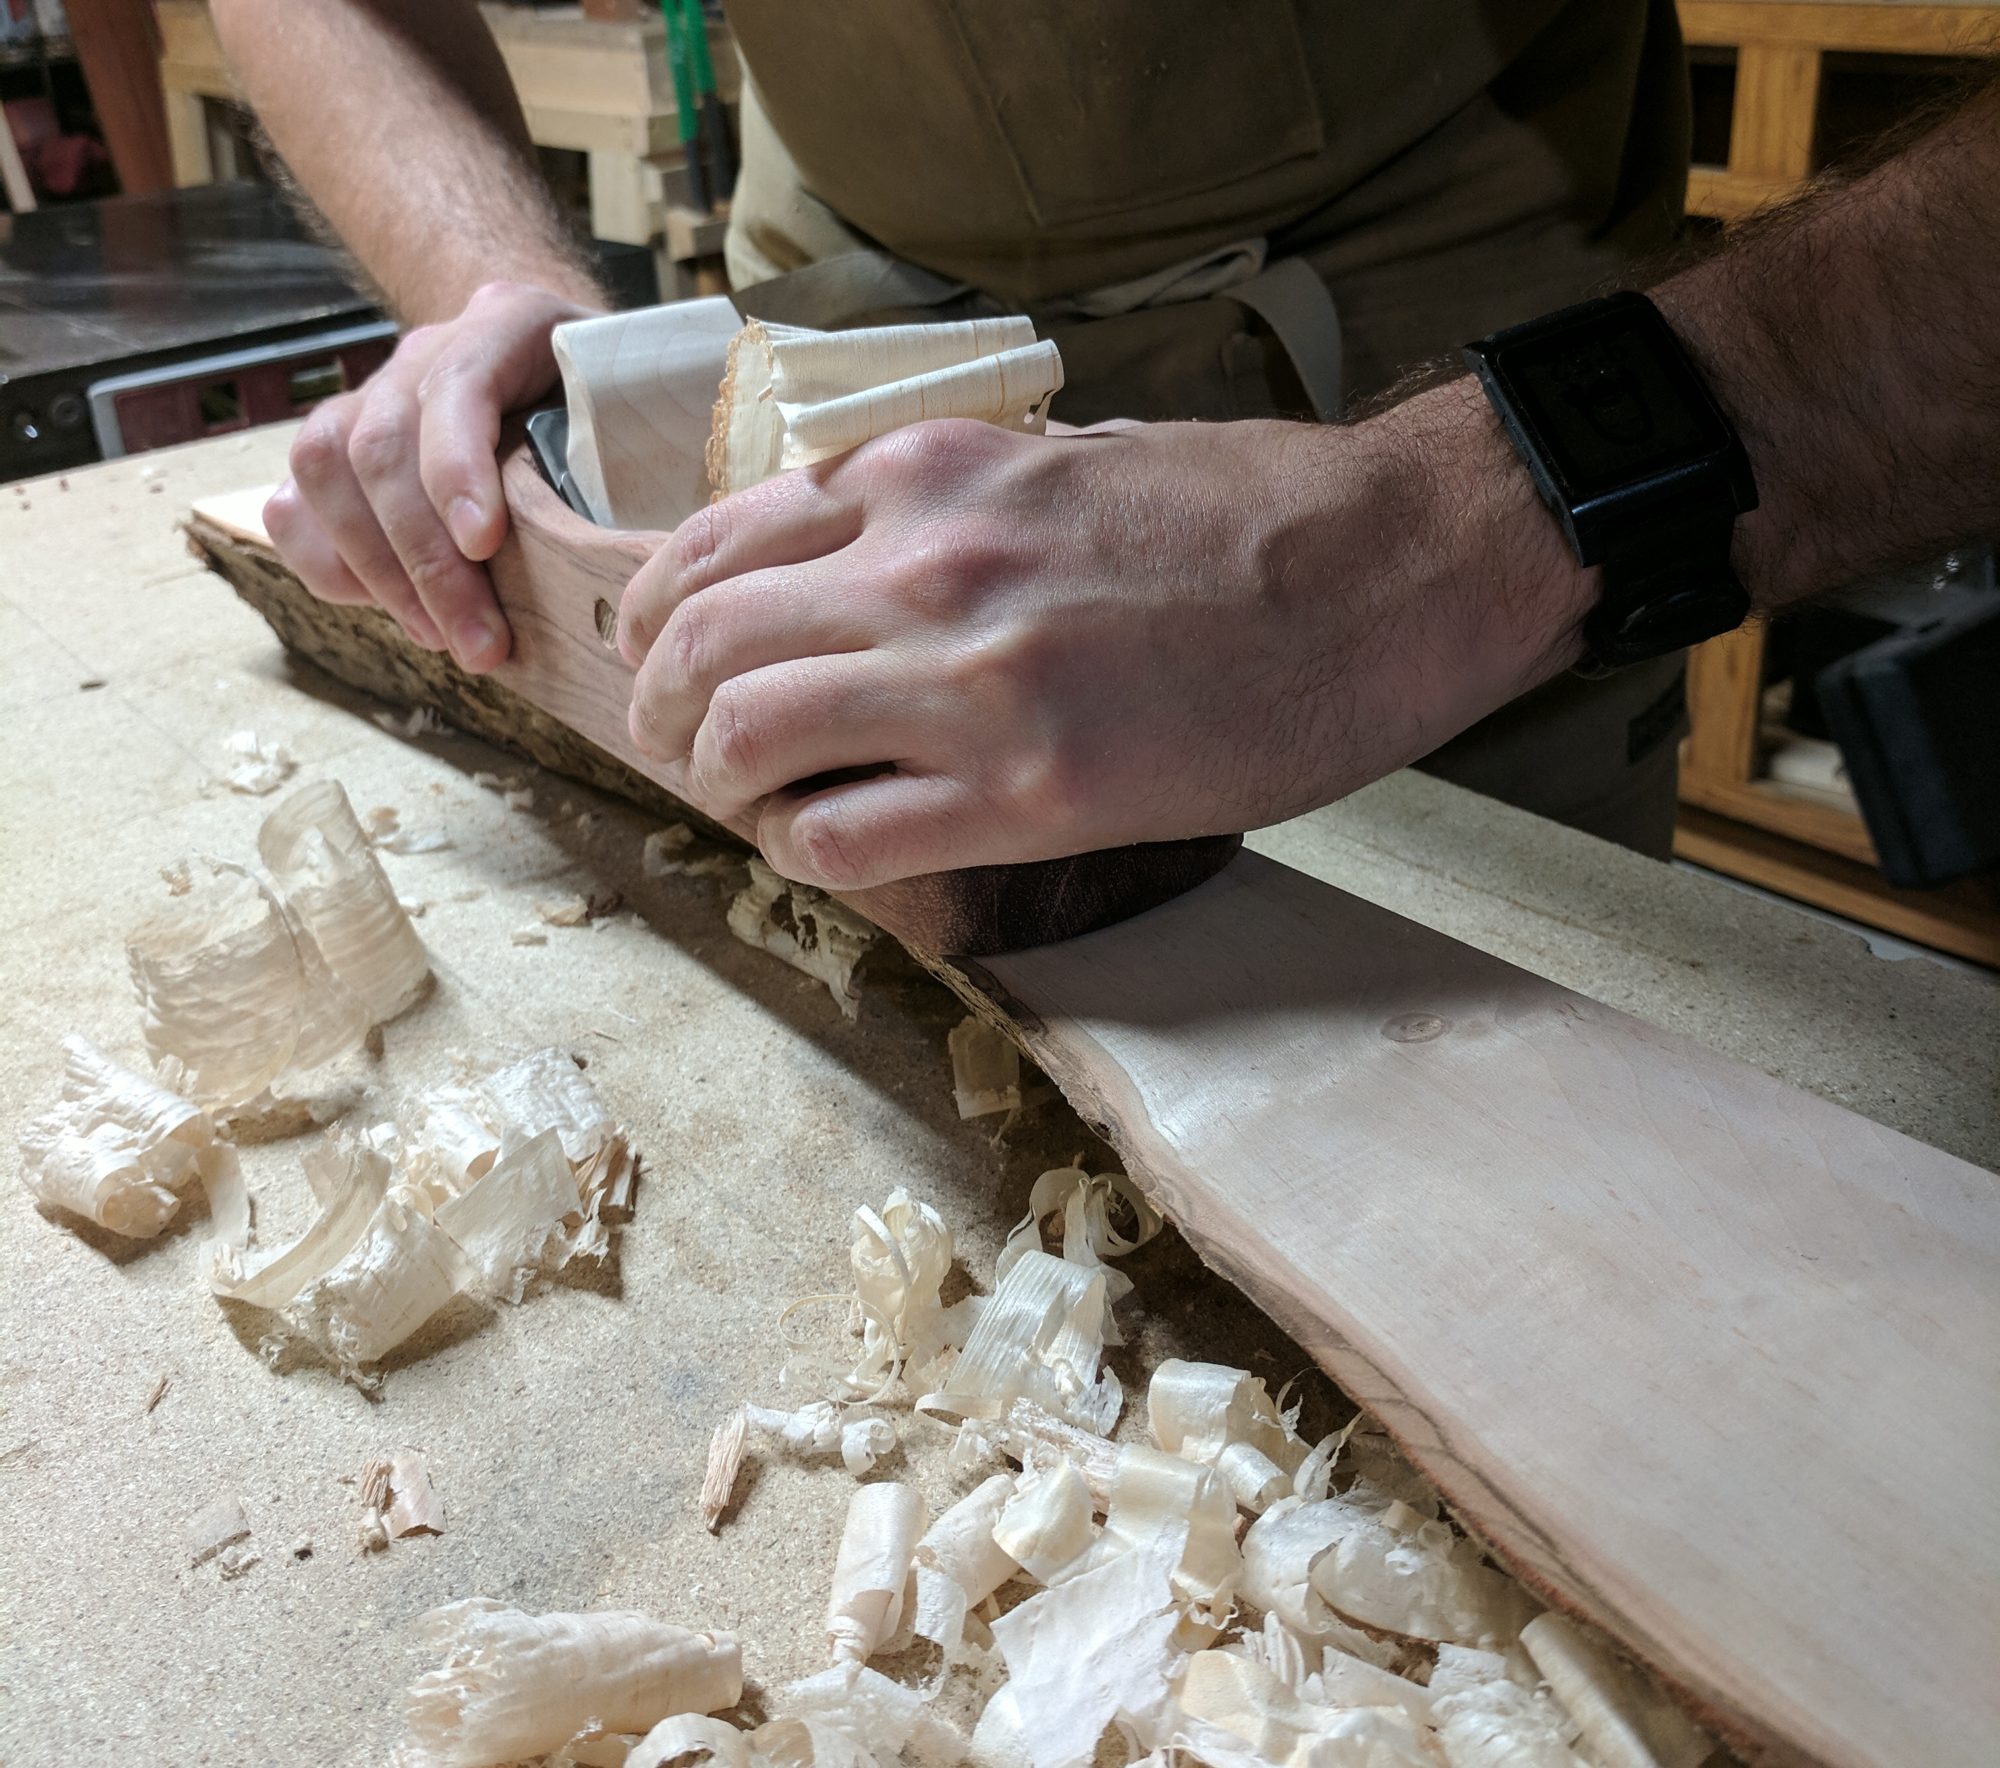
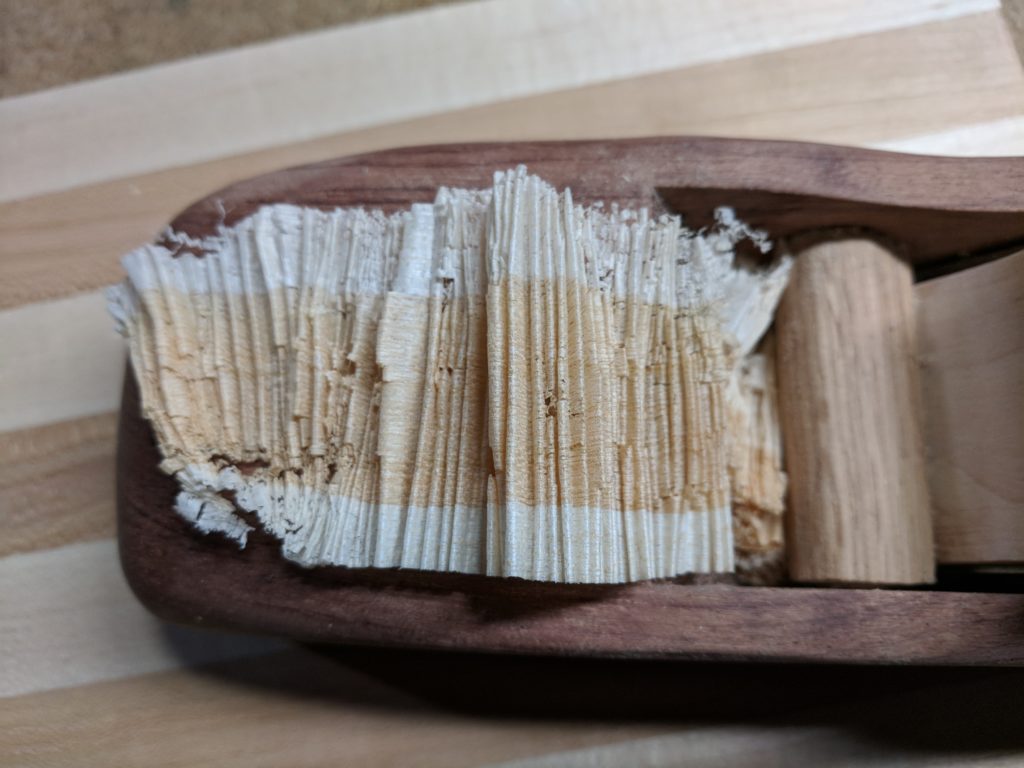
With the striped board, after the glue up, the board is generally done. It’s run through the planer to remove any slop in your glue up. In my case, I didn’t take great care in planing it, and ended up with some snipe. This gave me an excuse to break out my hand plane, and flatten out the snipe.
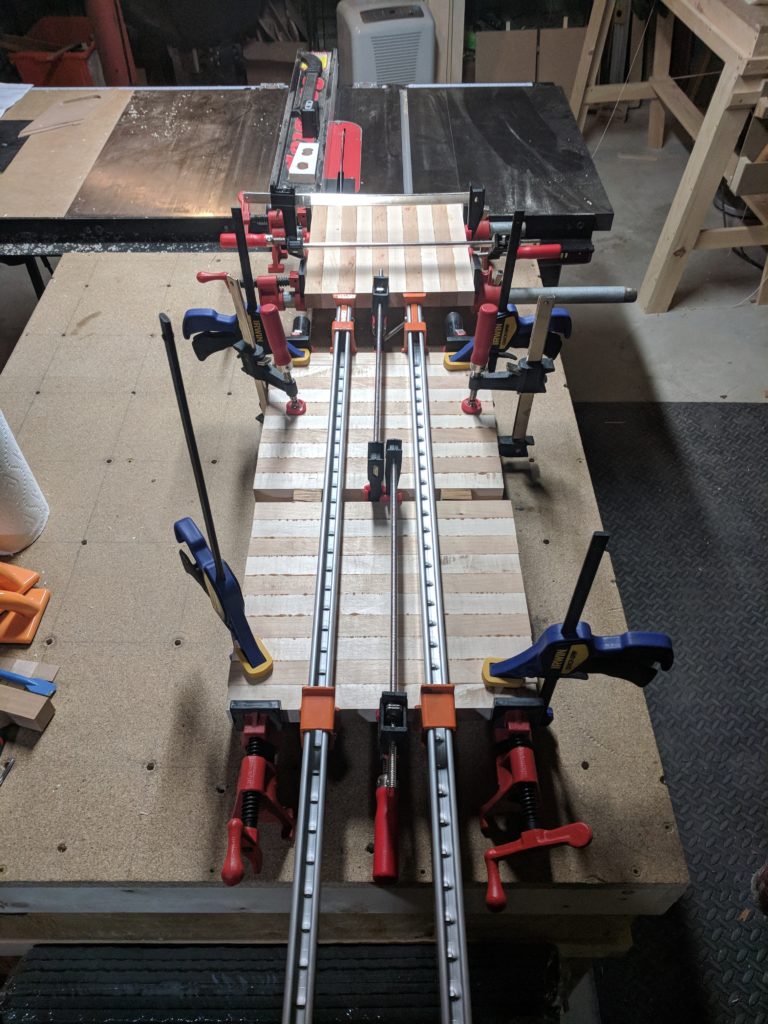
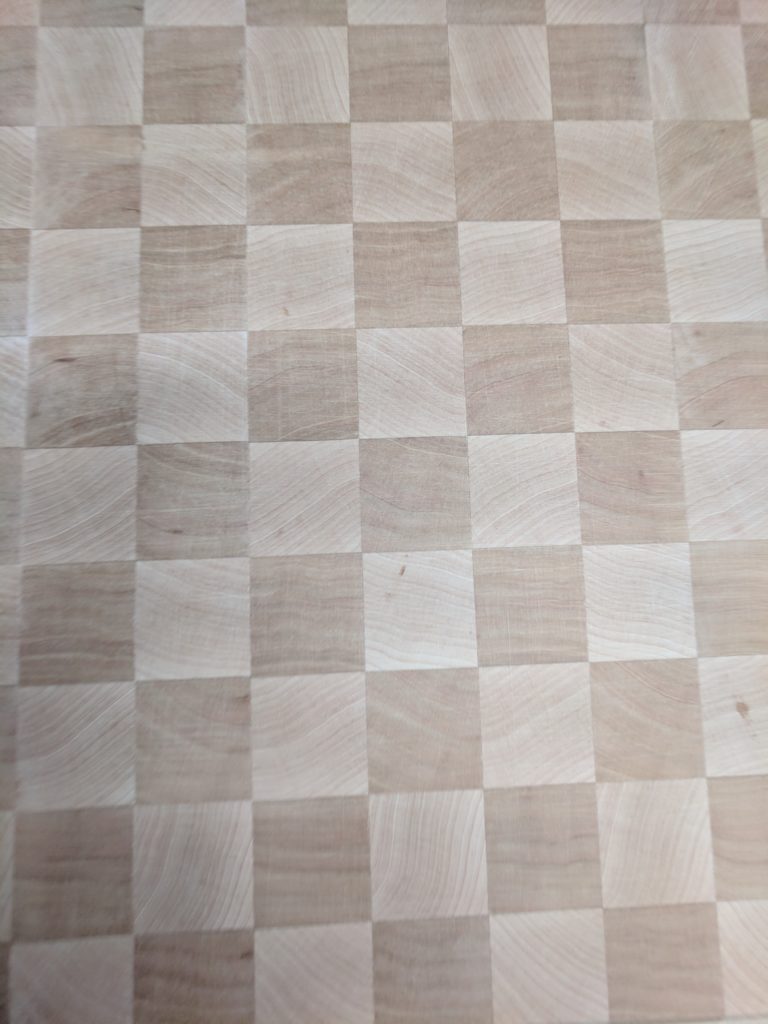
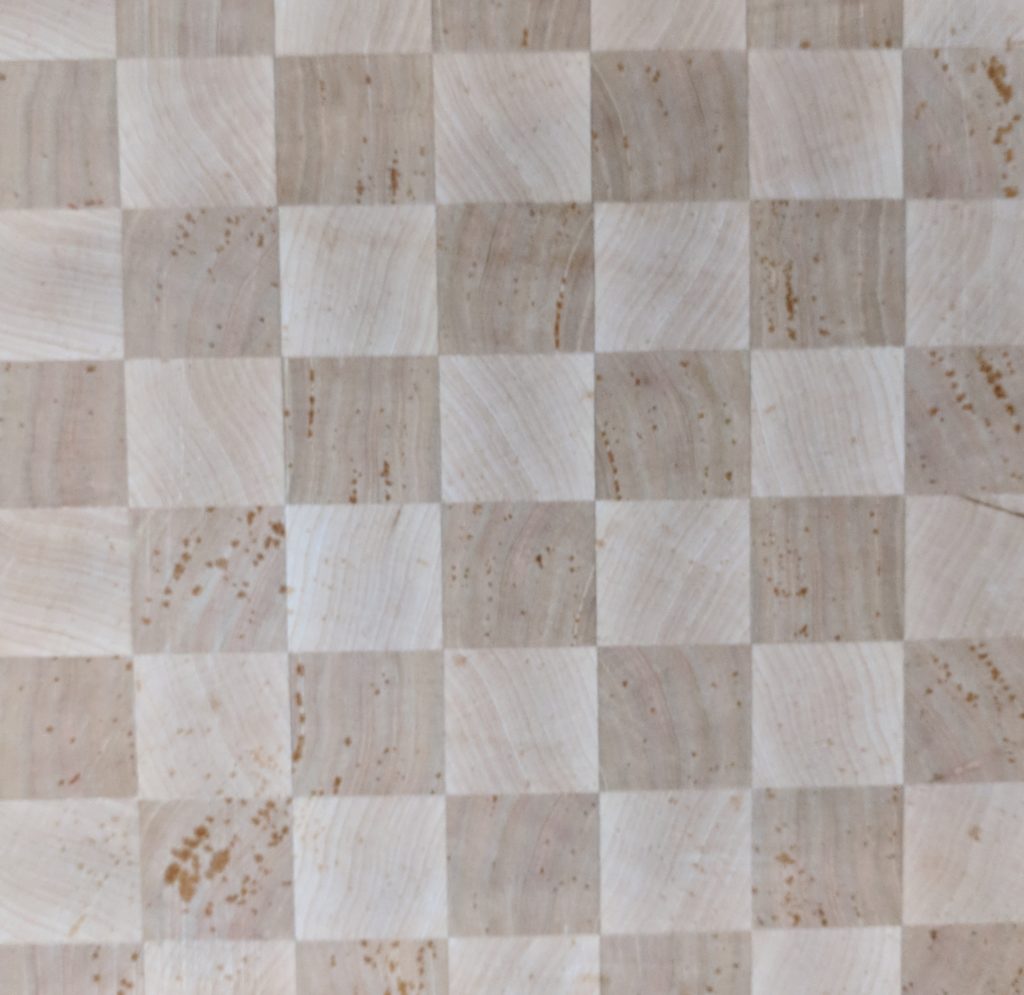
On the checkered boards, you need to cross cut the striped glue up at the thickness you’d like to end up with. End grain glue joints are very weak, so they must be avoided. This is why you cut the cross cuts to the thickness, rather than the width, you want your stripes. Each cross cut is rotated, and every other one is flipped. This way each piece ends up being glued edge to edge rather than end to end, producing the final checker pattern with end grain visible on the final surface.
The end grain faces of the final glued up boards require a lot of finishing work. End grain can be very dangerous to plane, so I needed to use a belt sander. Belt sanding leaves noticeable marks, so after belt sanding a random orbital sander is used, moving though the grits until all the marks are gone and the surface is glassy smooth. A lot of care is needed to make sure the boards remain flat through the process.
I finish all my boards with mineral oil. A liberal coat is applied to the boards, and allowed to soak in.

On the end grain boards, I let the oil soak all the way though the grain, through the inch thick board. This oil fills the wood pores, blocking food and water from entering the board later during use.
To keep the oil from drying out, a final finish of blended oil and beeswax is added. I melt the mixture and rub into the board. The wax addition seals everything, keeping the oil in.
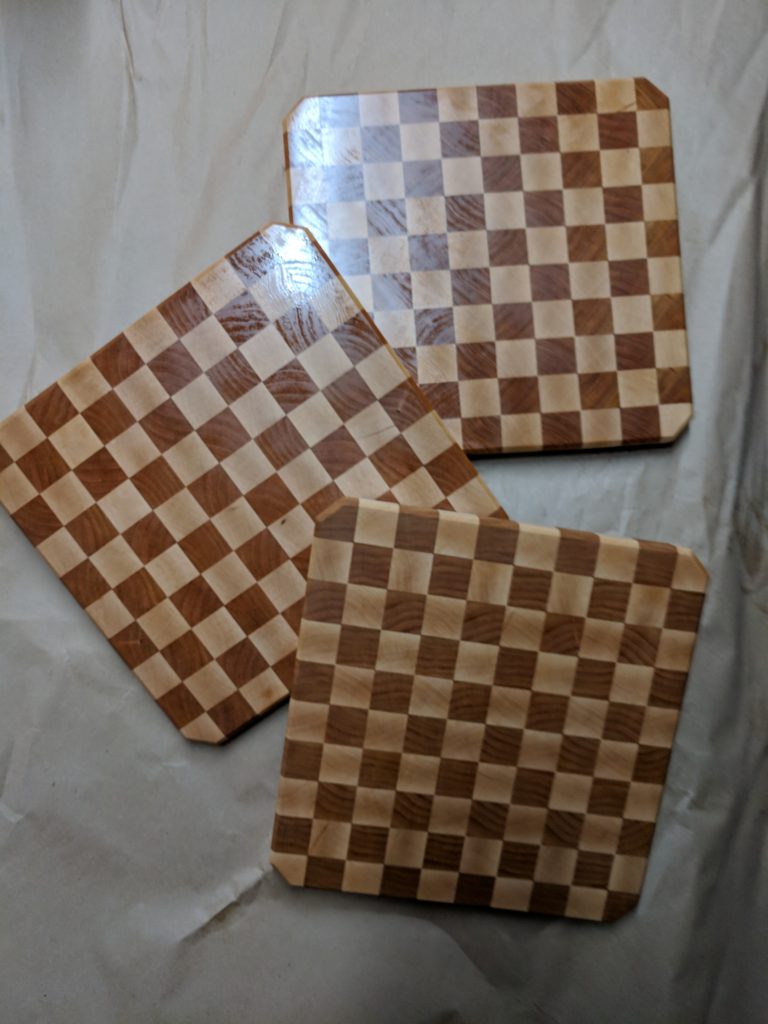
Check them out on Etsy.