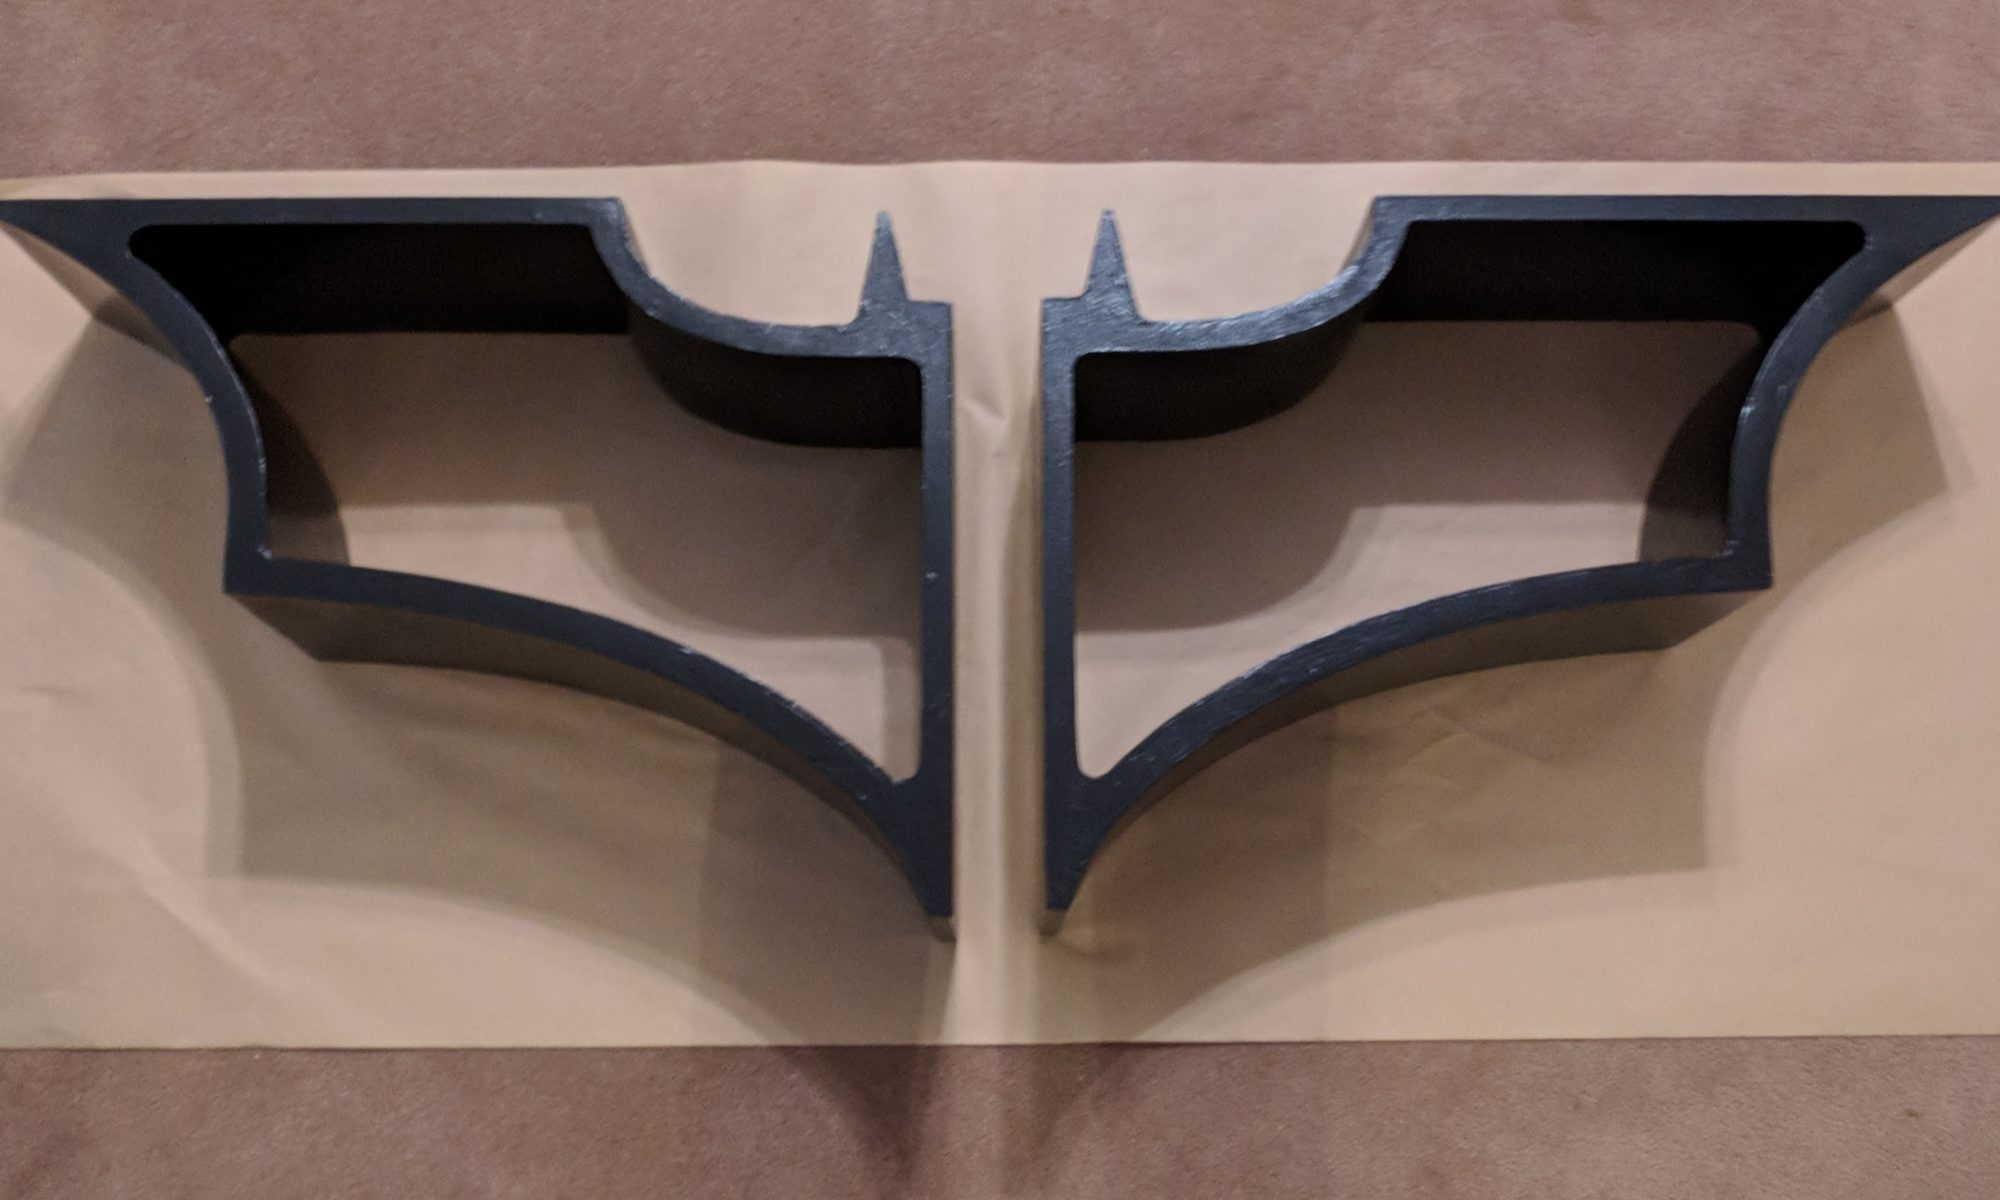
A friend of mine (an excellent woodworker himself) mentioned he had a coworker who was looking for a Batman book shelf, and showed me a photo of what he had in mind. He felt this project was more up my alley and I agreed that it was something I’d be interested in trying my luck on.
I spoke with his coworker and agreed on dimensions. The shelf would be 2 pieces totaling 4 ft wide, with a depth of 8 inches.
I considered making the shelves out of a laminated stack of CNC cutouts. While this certainly would have been the easiest approach, It would have required 8 sheets of 3/4″ MDF, and left a lot of unusable scrap.
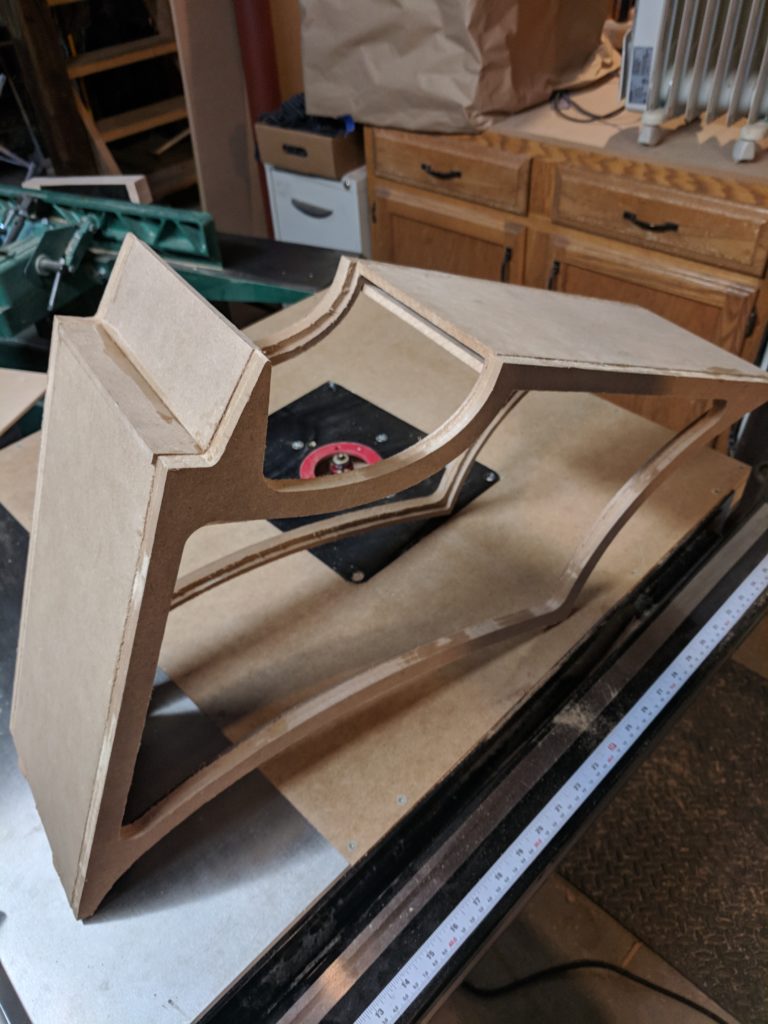
I settled on a more labor intensive, but resource friendly approach. For starters, I CNC cut a front and back frame for each side of the shelf.
Each of these frames had a 1/4″ rabbit cut as part of the CNC program. This rabbit allowed for paneling to be attached joining the front to back.
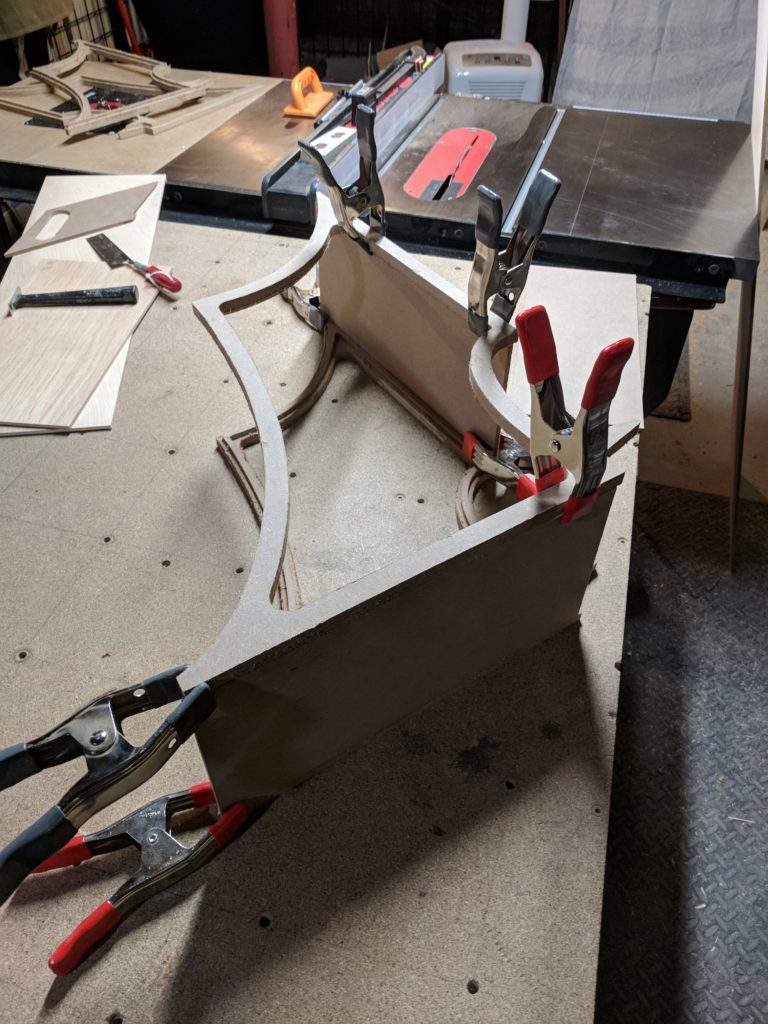
I glued up all the flat surfaces of the shelf first to define the 3D structure. The 1/4″ MDF fit perfectly in the CNC cut rabbits. Bellow; I add a temporary cross piece to keep things square.
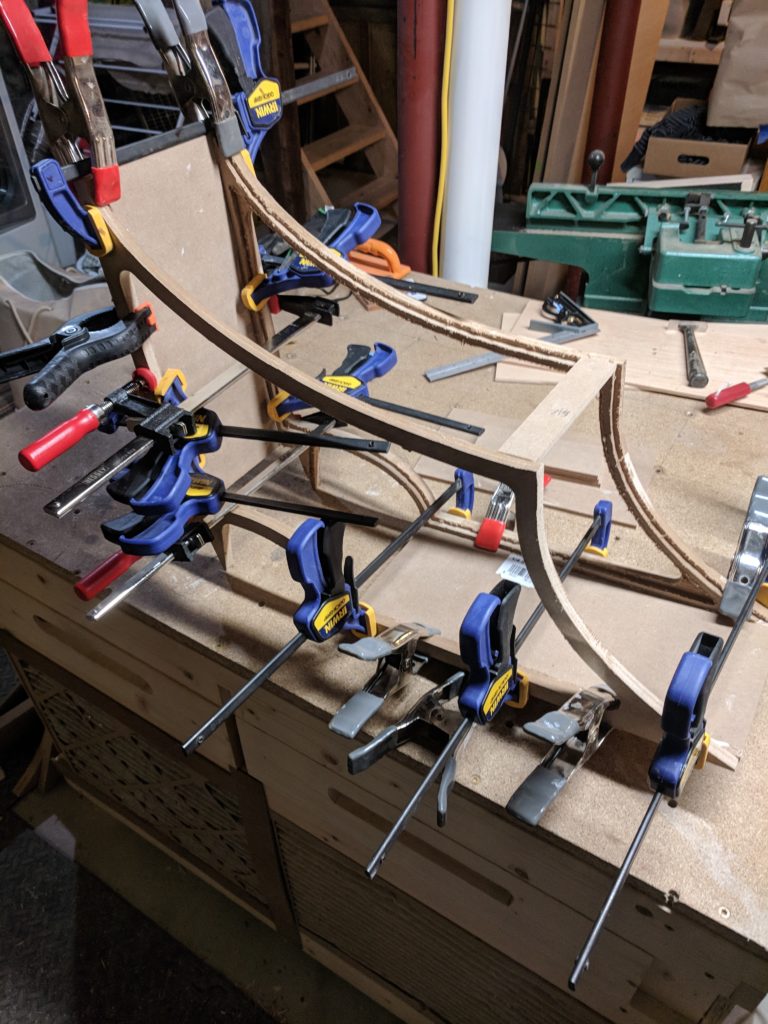
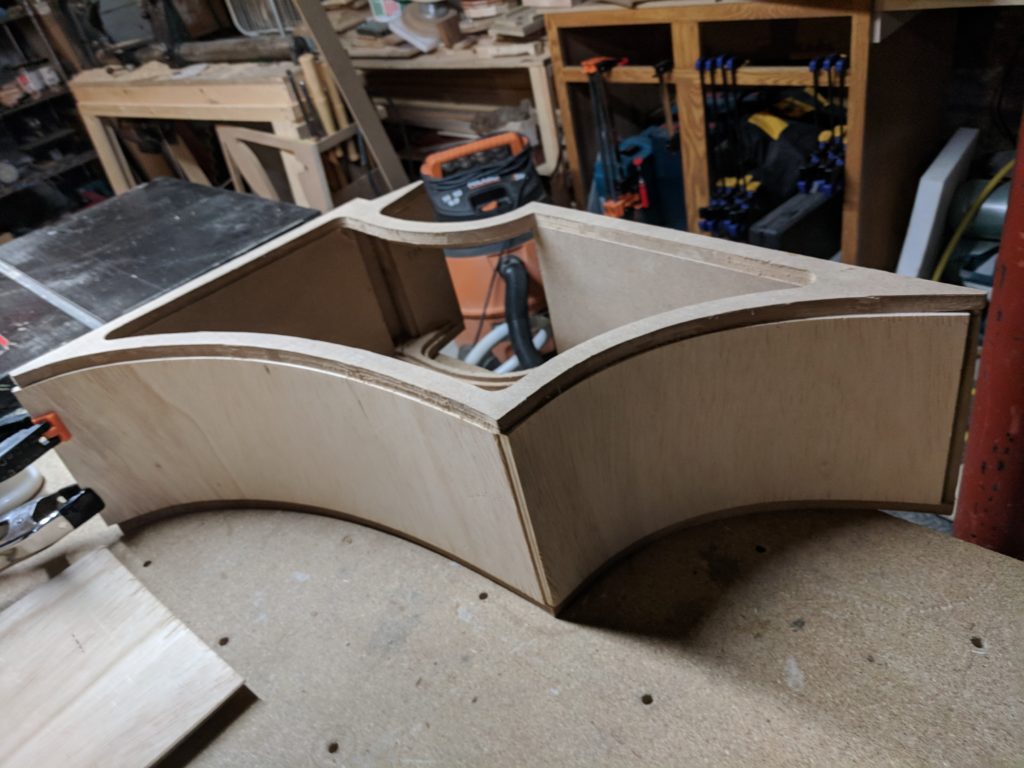
For the curved surfaces I considered a number of options, but settled on Wackywood, a type of plywood designed with the each ply oriented in the same direction. This orientation allows the sheet to bend in one direction while staying stiff in the other.
I had never used Wackywood, and was disappointed to find that while most sheet products fall under their nominal dimensions (a typical sheet of thin ply or MDF is around 1/32″ undersized) Wackywood was actually over-sized, measuring in closer to 3/8″. More on this later…
I wrestled the sheets through my table saw ripping them to match the width of the MDF panels already glued up. Using a string to follow the curves of the front and rear frames, I was able to measure and cut the Wackywood to length.
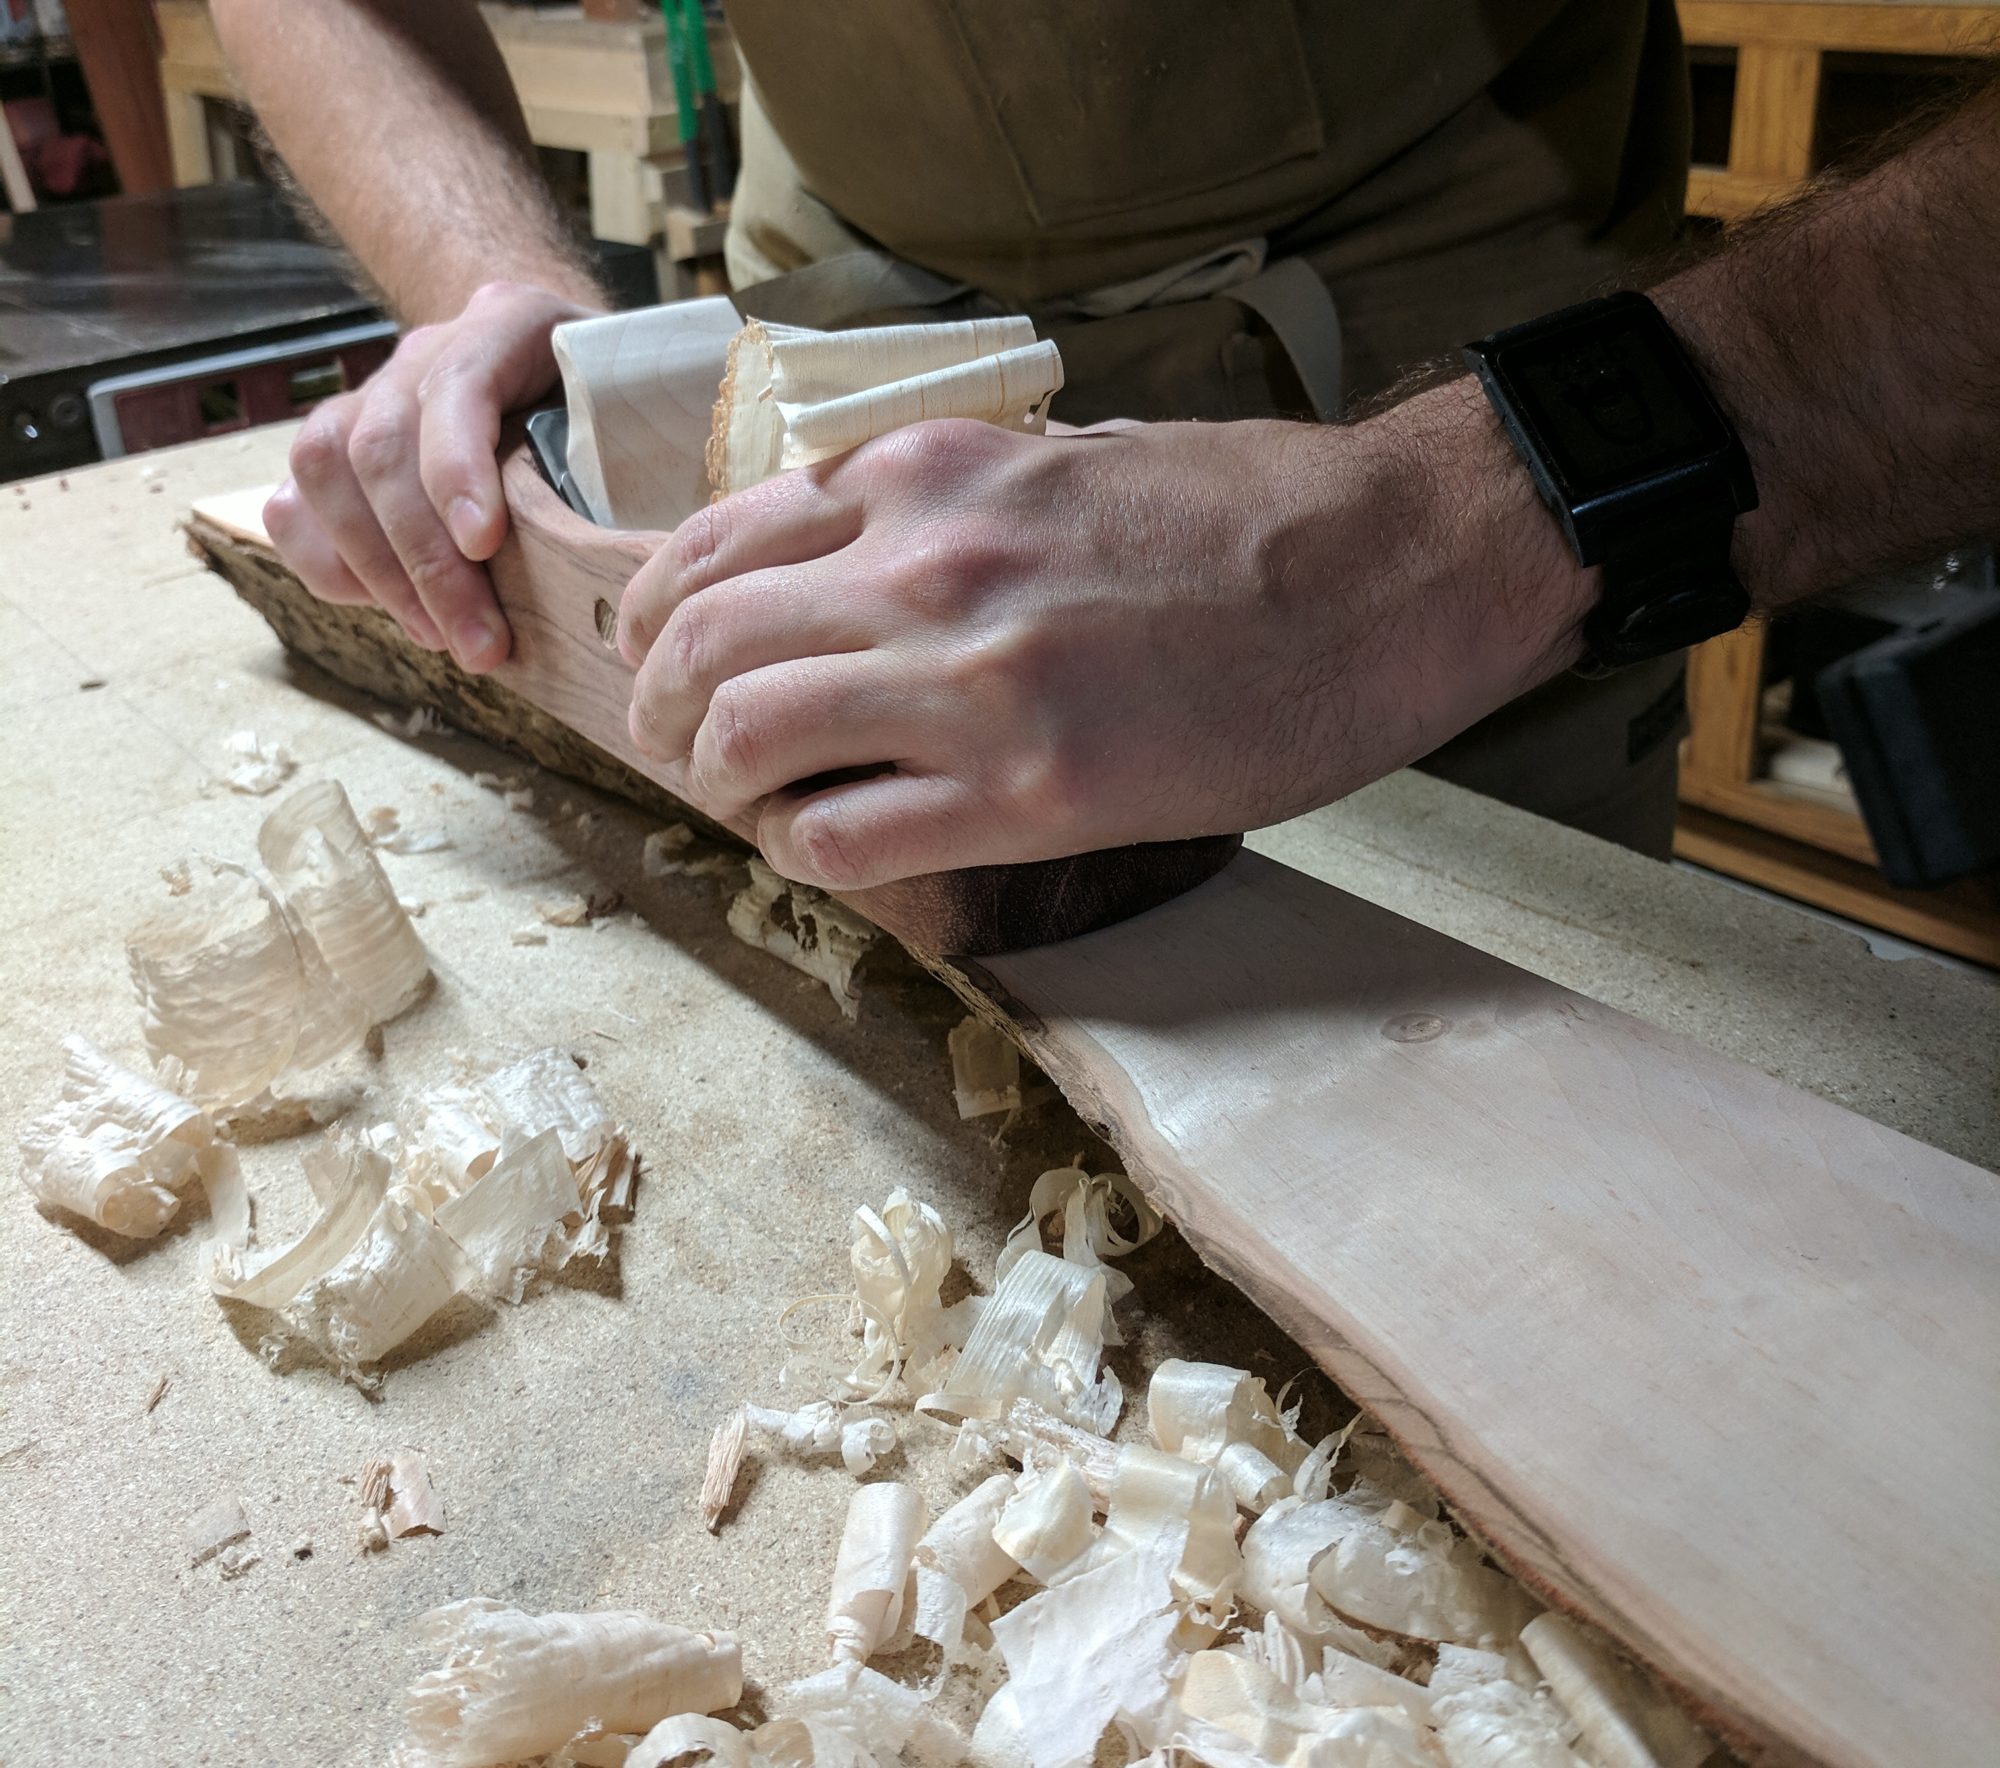
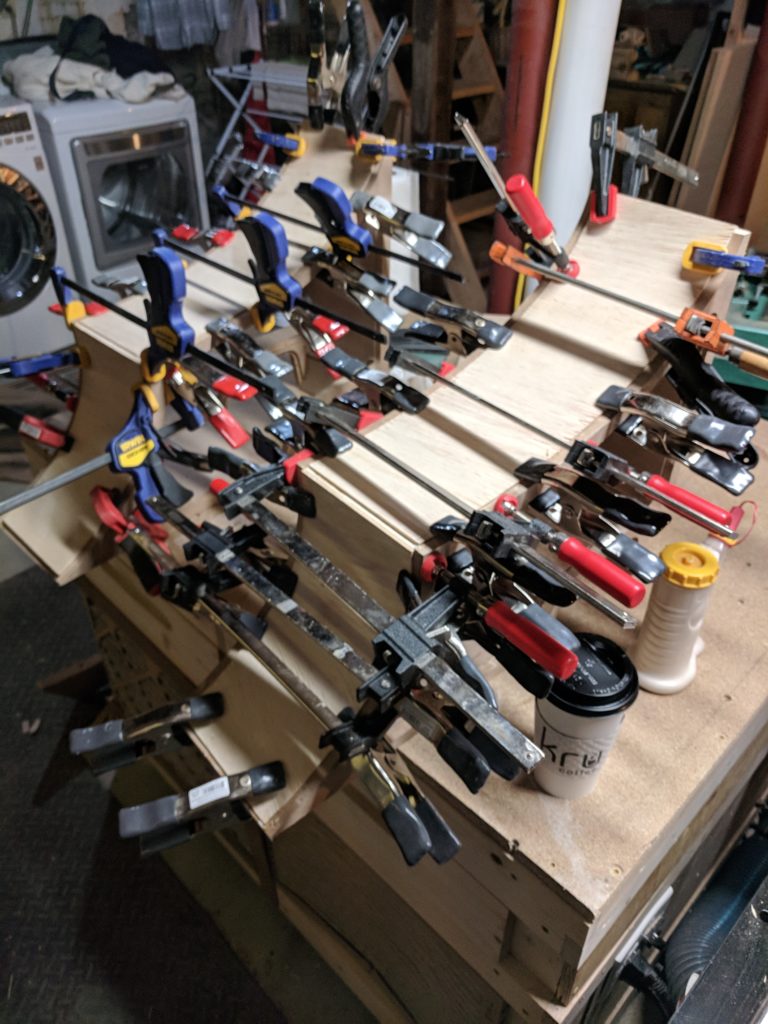
After using every spring clamp I own then running to the store for more, I pieced in the curved sections and glued them. I did the outsides first, then filled in the insides.
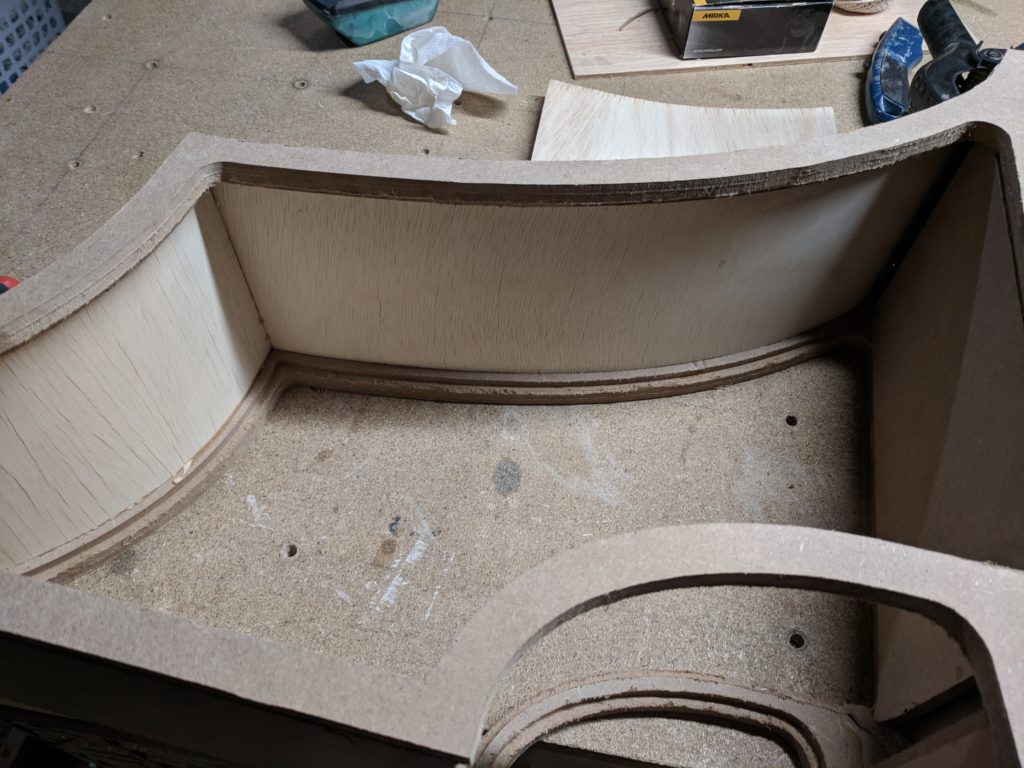
I sadly missed a number of steps as far as photos go, but the next step was to fix the step created trying to fit the thick Wackywood into the 1/4″ rabbit. I ripped down pine strips to match the thickness of the step, and edge banded the MDF. In some of the tighter curves, I needed to soak the pine to soften it before clamping it into the bend.
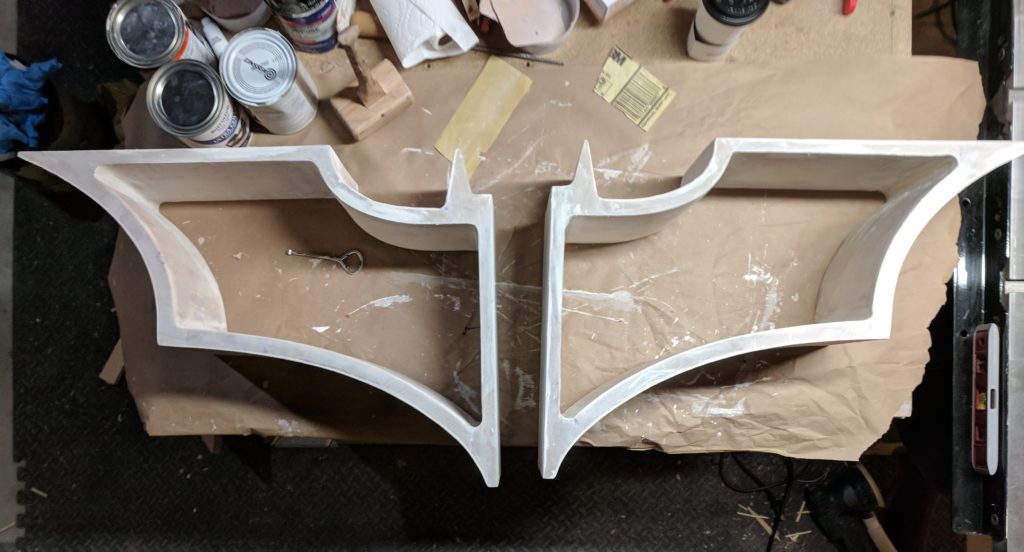
To create all of the very tight radii (the ear curves and inside fillets) Bondo body filler was applied and sculpted. While this method worked, it required lots and lots of sanding; everyone’s favorite.
Once I was happy with the sanding (or I should say too tired and dusty to continue any more), a thick primer was brushed on to further cover up the Wackywood’s crackled texture and any minor pocks in the Bondo. Some wood filler was used to skim coat the particularly bad areas, followed by some more sanding.
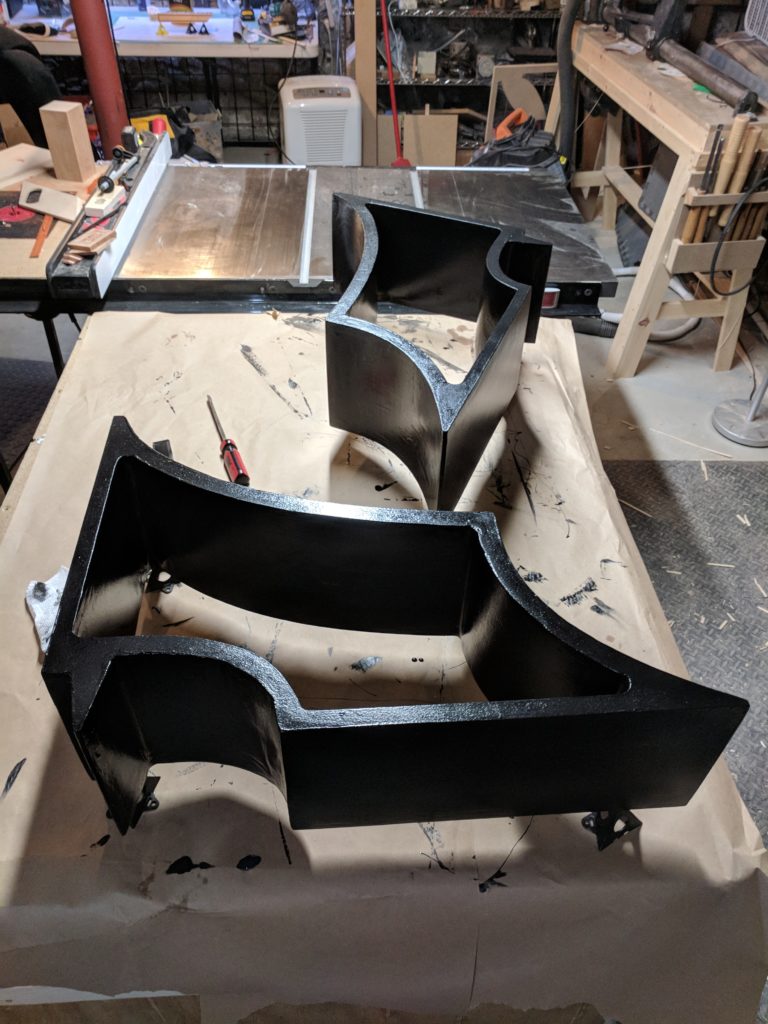
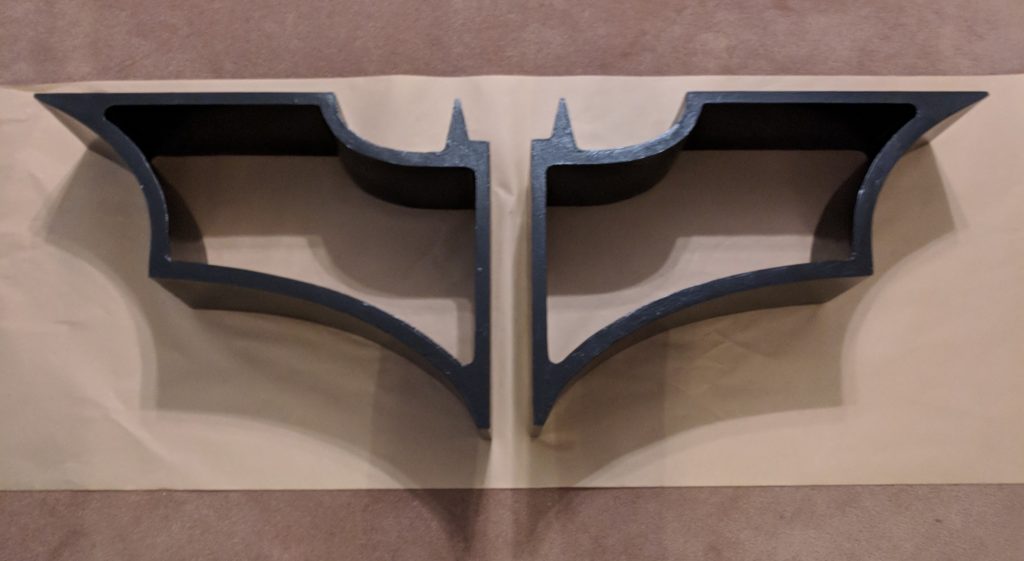
Finally it was time for painting. It just wouldn’t be right if it wasn’t deep black. Four coats of paint were applied using a foam roller. The roller left a nice “orange peel” texture, giving the shelf an almost metallic texture as well as hiding imperfections.
The customer was very excited to see the Batman shelves!
I am very curious to see how this looks loaded up with books on a wall.